Saturday, February 20, 2016

Bryndzové Halušky


My sister's dance club, Volé teamed up with Alpha Sig for Penn State's THON this weekend. I figured I would make her a lunch that would fuel her up for a long day of dancing.

Bryndzové Halušky (Brind-ZOVE  Hal-USH-kee) is not only the national dish of Slovakia but one of my sister's favorite meals and she describes it as Slovak Mac & Cheese. Bryndzové halušky translates to Potato Dumplings with Bryndza cheese. Bryndza is a soft cheese- very similar to Feta. I buy mine at a specialty Eastern European market in State College but you can always use feta as a substitute.  


If you want to learn more about THON click HERE

Ingredients: Makes 4 Servings

White Potatoes--- 3 (Large)
Flour--- 2 CUPS
Salt--- 1 TBSP
Pepper--- 2 TSP
Onion Powder--- 1 TSP
Garlic Powder--- 1 TSP
Slab Bacon--- about 1/2 LB
Bryndza Cheese--- 6-8oz
Sour Cream--- 1 CUP
Butter--- 1 TBSP
Olive Oil--- 2 TSP

STEP BY STEP:


  • 1. Peel potatoes and finely grate. Strain out excess water and pat with paper towel.


  • 2. Stir in salt, pepper, onion powder, garlic powder, and flour. Knead until solid ball forms.

  • 3. Flatten dough and cut halušky into 1/2" dumplings
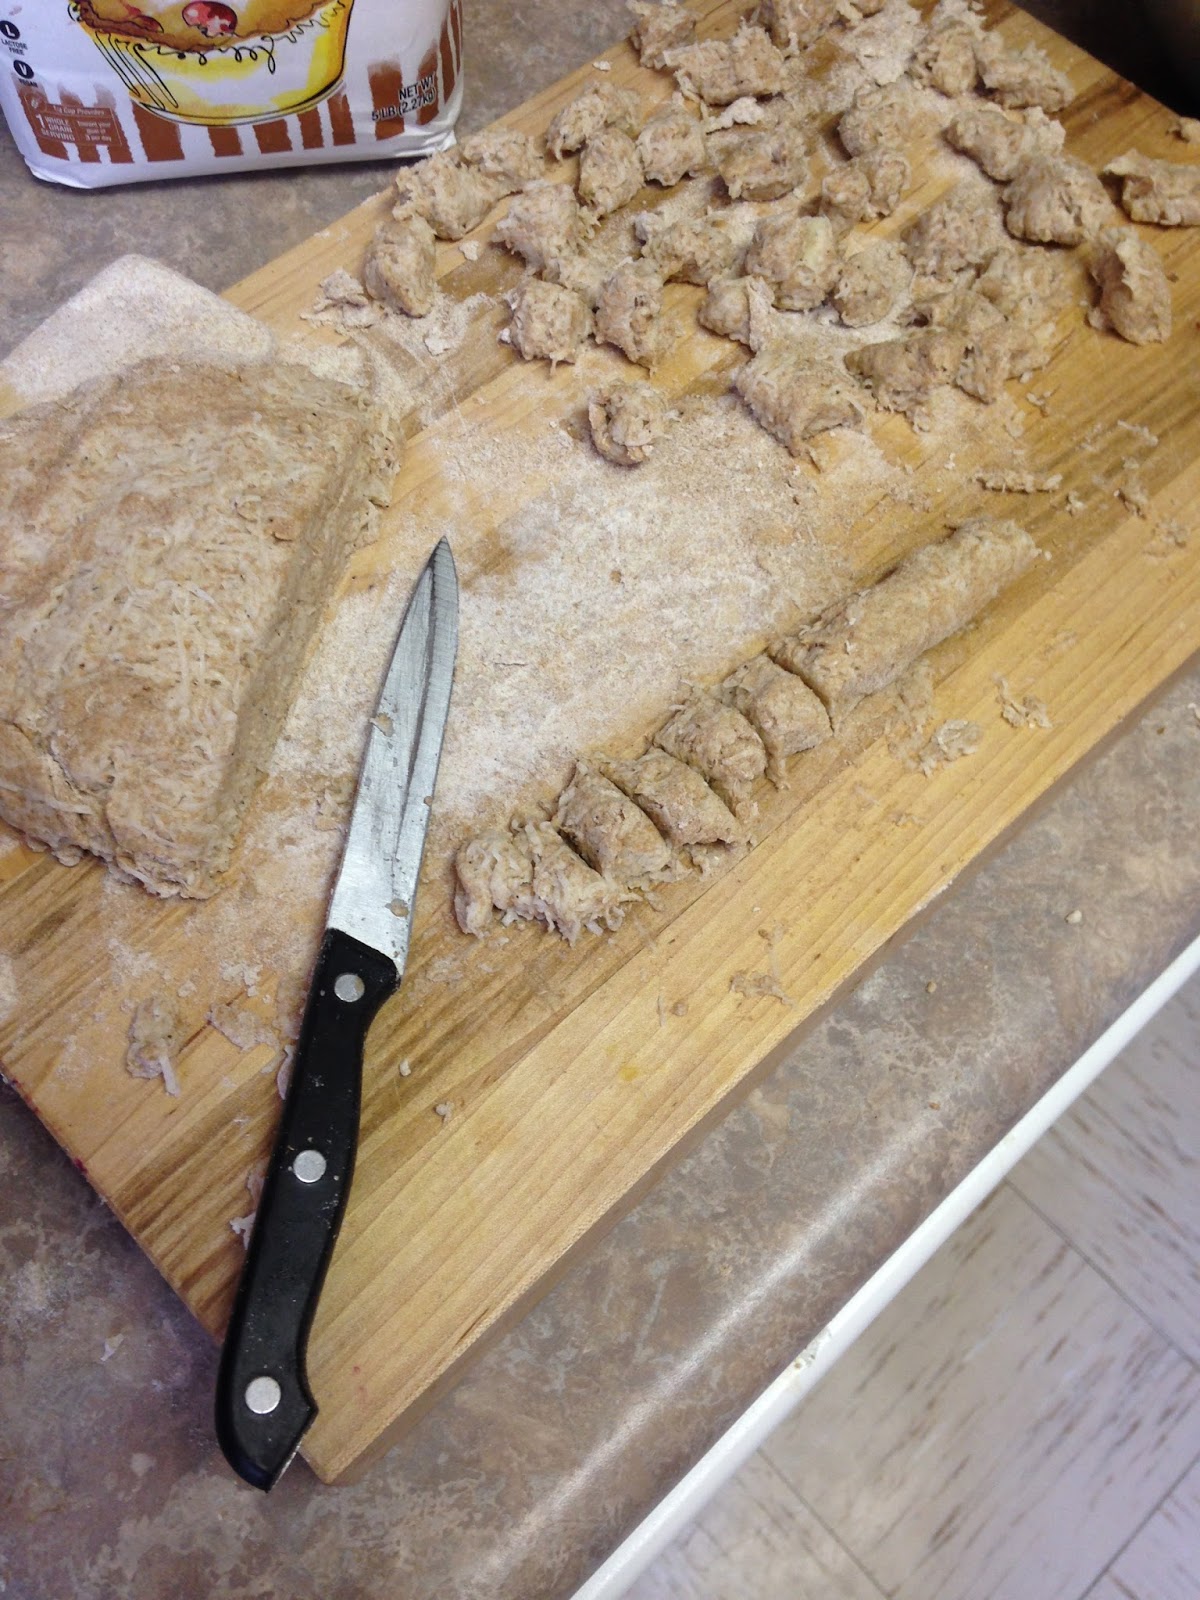
  • 4. Cut slab bacon into small bits


  • 5. Heat stove to Medium-High. Melt butter and add olive oil to a 12" frying pan. Add bacon and fry until desired crispiness. 

  • 6. Bring a large pot of water to a boil. Add halušky to the water and reduce to a simmer. Strain once dumplings float to the top. Add to a large mixing bowl.

  • 7. Cut cheese into small bits and add to a small mixing bowl. Add sour cream and stir. I found it best to mix the cheese and sour cream by hand which helps break the cheese into even smaller pieces.


  • 8. Add bryndza and sour cream to halušky and stir until evenly mixed.

  • 9. Add bacon plus drippings to the halušky. The hot oils help melt the cheese even more. You can mix the bacon into the halušky or serve on the top.    


Hope you enjoy this dish and Dobru Chut'!!


Friday, February 19, 2016

CRS Meal Week #1- Empanadas


For the next 5 weeks, I'll be posting a meatless recipe for Lent. Catholic Relief Services created a program called Operation Rice Bowl which raises money for basic necessities in impoverished countries. Each week, CRS features a recipe from a different country across the globe.

This week, Empanadas from Colombia were featured. This particular recipe called for the dumplings to be filled with a soft cheese but to be honest I'm not a huge cheese fan. Instead I filled the empanadas with kidney beans, onion and pepper. Either way it turned out great!


I realized empanadas are basically large pierogies that you fry instead of boil. I love learning about the foods across the world and it's cool to see how each country seems to have a signature dumpling dish. And now that I know how easy they are to make, I'm sure I'll be posting a recipe with a beef filled or fruit filled empanada sometime soon!

If you want more info on this dish or want to check out the Rice Bowl program click HERE

Ingredients: Makes 2 Large Empanadas

For the empanada dough:
All Purpose Flour--- 1 CUP
Water--- 1/2 CUP
Vegetable Oil--- 2 TBSP
Salt--- 1 TSP
Baking Powder--- 1 TSP
Egg--- 1

For the filling:
Kidney Beans--- 1 Can
Onion (chopped)---3 TBSP
Italian Sweet Pepper (chopped)--- 1/4 CUP
Garlic (minced)--- 1 Clove
Ground Cumin--- 1 TSP
Chili Powder--- 1 TSP
Olive Oil--- 1/4 CUP

STEP BY STEP:


  • 1. Heat stove to Medium. Lightly oil medium-sized sauce pan and saute onion and garlic until tender. Next strain beans and add to pot.

  • 2. Stir in cumon and chili powder until evenly mixed. Reduce heat to Low


  • 3. For the dough, combine flour, water, vegetable oil, salt and baking powder. Knead ingredients until a solid ball forms

  • 4. Flour a work surface and roll out dough until about as thick as a pencil 

  • 5. Cut 5" circles of dough
(I used a small plate to trace out my circle)

  • 6. Fill half of the circle with beans and fold the empty half to seal the dumpling. Wish egg and brush around the edges of the dough.
(Use fork to press and seal the edges)

  • 7. Heat stove to Medium-High. Add olive oil once hot. Fry empanada on each side until golden brown. 2- 3 minutes.


Once brown, remove empanada and let sit on a paper towel to absorb excess oil. Serve with rice, salsa, sour cream and chives!!


Wednesday, February 17, 2016

Chicken & Risotto Florentine


I actually made this recipe by mistake, well I guess it was a lucky mistake. I typically prepare my lunch the night before so on this particular night I was making chicken, risotto, and spinach. Then had the idea of adding the chicken to the risotto and spinach to absorb some extra flavors. 

After telling my Mom about my creation she said it said it sounds a lot like Chicken Florentine- an Italian dish with spinach. In my opinion, adding the risotto made it like an "Italian stir-fry" and it was such a good lunch the next day. I had to use frozen spinach for this recipe and surprisingly it kept a good shape and was pretty flavorful. Once I can get fresh spinach I'll have to re-make this dish.

Here it is, hope you enjoy! Buon appetito!!

Ingredients: For one serving
Boneless Skinless Chicken Breast--- 4 oz
Arborio Rice--- 1/2 CUP
Onion (Chopped)--- 1/4 CUP
Garlic (Minced)--- 1 Clove
Spinach--- 1 CUP
Water or Stock--- 1.5 CUPS
Olive Oil--- atleast 3 TBSP
Butter--- 1 TBSP
Dried Oregano--- Pinch
Salt & Pepper--- To taste

STEP BY STEP:
  • 1. Heat stove to Medium, melt butter in medium sized sauce pan and add 2 TBSP of olive oil. Add garlic and onion and saute until tender

  • 2. Add rice to pan and stir for 2 minutes

  • 3. Add 1/2 CUP of water to rice and bring to a simmer. Stir rice until liquid is evaporated. 

  • 4. Add the other 1 CUP of water to rice and stir until creamy. Reduce heat to low and add spinach to the rice.

  • 5. Heat an 12" frying pan to Medium-High and add 1 TBSP of oil once hot

  • 6. Cut chicken to desired shapes and season with salt, pepper, and oregano. Add chicken to oiled pan 

  • 7. Once chicken is cooked through, Add to the risotto and spinach and stir until evenly mixed.


Tuesday, February 16, 2016

Single-Serve Meatloaf


This is a great recipe if your looking for a dinner that doesn't require a lot of prep work. Simply add veggies, meat and bread together, bake for 45 minutes and you have a hearty dinner. Meatloaf is one of the easiest dishes to make and you can be as creative or basic as you want with this meal. I added okra too just to add extra color. My roommate gave me the idea to divide the loaf and bake in a muffin tin. We're pretty short on fridge space at our apartment so making them into single-serve loafs made them easier to store.   


Ingredients: Yields 6

Ground Beef, Pork & Veal Mixture--- 1 LB
Whole Wheat Bread--- 3 slices
Milk--- 1 CUP
Sweet Onion (chopped)--- 3/4 CUP
Garlic (minced)--- 2 cloves
Okra (sliced and chopped)--- 1 CUP
Paprika--- 2 TBSP
Salt--- 1 TSP
Pepper--- 2 TBSP
Cooking Spray

STEP BY STEP:


  • 1. Preheat oven to 375F

  • 2. Cut onion, garlic and okra

  • 3. In a bowl, pour milk over bread and tear slices apart until they are the size of croutons

  • 4. Add onion, garlic and okra to the soaking bread and mix evenly 

  • 5. Add meat, salt, pepper and paprika to the bowl and knead until you have a large solid ball of meatloaf

  • 6. Coat a muffin tin with cooking spray. Divide the large loaf into 6 equal sized balls. Stick each ball in the muffin tin.


  • 7. Bake at 375F for 45 minutes (you can always add ketchup to the tops of the mini meatloaf about 30 minutes into baking to allow for the ketchup to ooze into the meat for the next 15 minutes) 

  • 8. After baked, let cool for 5 minutes before serving.   


Sunday, February 14, 2016

Homemade Pasta


My Poppop and Nana recently moved in with my family and I couldn't be happier for them. I'm extremely lucky to be living under the same roof which two people that I look up to so much. It also helps that they are both great cooks and bakers. In the process of cleaning out their old house, we came across this pasta machine made by Marcato Atlas. "Made in Italy" is engraved on the side so it must be authentic!
 
 
With the help of my roommates (because making pasta is a group effort), we decided to test the machine out. And we realized that pasta making isn't all that difficult-- It's actually pretty fun. My Poppop would tell me stories of how his mother made pasta by hand and as a kid he would eat pasta a few times a week. So while I kneaded and rolled the dough, I thought back to how my Great-Grandmother would make it in Summit Hill, PA. As you run the dough through the rollers, it requires more and more muscle to push it all through. Although I never met my Poppop's mother, I imagine she must have been pretty strong to roll out that pasta every week.
 
Even though it's so much easier to use boxed pasta, making it by hand is such an incredible experience especially when you watch these simple ingredients transform into golden pasta. It's a process that brings people together by making and sharing a meal- which when you think about it is the Italian way. 
 
 
Ingredients:

All Purpose Flour--- 1 CUP + extra for work space
Egg--- 1 (Large)
Olive Oil--- 1 TSP
Salt--- Pinch

STEP BY STEP:


  • 1. On a breadboard, create a well in mound of flour

  • 2. Break egg and add to the flour well. Using a fork wish egg

  • 3. Allow egg to soak into the flour and cover the egg by closing the well

  • 4. Knead dough until a solid ball forms. Be careful not to overwork the dough as it can become tough

  • 5. Flatten dough into a patty and lightly coat with flour

  • 6. Set pasta machine to widest setting and feed the dough through the rollers (Using two people is REALLY helpful). Once rolled you should have a longer, flatter sheet of dough. Fold from end to end and roll again on the highest setting
    • At first you may need to roll the pasta through the widest setting 2-5 times until the sheet becomes less airy
  • 7. Fold, roll, and fold. Keep repeating this step while decreasing the width setting on your pasta machine. I have 6 settings on mine (1-widest to 6- narrowest) 
    • You may need to lightly flour the outsides of your sheet of dough so it doesn't stick to the rollers 


  • 8. Run pasta sheet on the narrowest setting which should now be just about paper thin

  • 9. Attach pasta cutter and run sheet through once and just like that you'll have fresh pasta! (You'll also have to cut pasta into desired lengths)


  • 10. Bring large pot of water to a boil then add pasta to boiling water. Let cook for 1-2 minutes

 Strain and serve with your favorite pasta sauce!!

(2/14/16) Post dedicated to my Nana and Poppop--- Happy Valentine's Day guys, I love you and welcome home!! -- Alex

Saturday, February 13, 2016

Mini Puff-Pastry Sweet Potato Pies


So I'm getting to the end of my extra puff pastry I used to make my Wellington. Last night the idea of using the pastry as a pie crust popped into my head. The only problem was it was 11:30 at night and I didn't really have any great fruit fillings on head. But then I came across the sweet potato and figured I could make a Thanksgiving-like treat. If you have puff pastry already made this can be a really quick recipe and they are perfect finger foods.  

Ingredients:
Puff Pastry--- 1 (about 10"x 10")
Sweet Potato--- 1 CUP
Light Brown Sugar--- 3 TBSP
Cream Cheese--- 2 TBSP
Salt--- 1 TSP
Egg--- 1
Water---1 TSP
Non Stick Spray

STEP BY STEP:


  • 1. Preheat oven to 350F

  • 2. Make a puff pastry-- recipe HERE

  • 3. Wrap sweet potato in tin foil and bake for 45 minutes or until tender

  • 4. Once cooked, peel potato and mash. Mix in brown sugar, cream cheese, and salt.

  • 5. Roll out puff pastry and cut into pieces that are large enough to fill muffin tin. Coat the tin with non-stick spray as well. 

  • 6. Scoop potato mixture into pastry shells

  • 7. Cut remaining puff pastry into thin strips and place over little pies (should look like a lattice)


(I tried my best on the lattice, but my sister is a lot better at it than me!!)


  • 8. Make egg wash (egg+ water) and brush over the pies 

  • 9. Bake at 350F for 20 mintues
Let cool for 5 minutes before serving and feel free to sprinkle brown sugar over top of the pies!!