Friday, November 11, 2016

Apple & Butternut Squash Bisque


For me, Fall wouldn't be compelete without making a batch of Butternut Squash Bisque! Aside from Borscht, this has to be my other favorite soup. These is a great recipe for anyone with a garden or someone who is into self-sufficiency as butternut squash have a reputation for their long-shelf life. Because the squash store so well, stock up now while you still can so you can make a fresh, warm pot during the upcoming winter months! An additional ingredient that heightens the flavor is another fall classic-- the apple. The pectin found in apples makes for a thicker and sweeter soup!

                                                                                                  
Ingredients:

Butternut Squash (Peeled and diced)--- 2 Lb.
Water or Stock--- 1-2 quarts (depending on your preferred thickness)
Ground Cinnamon--- 2 Tbsp
Crushed Black Pepper--- Pinch
Nutmeg--- To Taste
Apple (Peeled and sliced)--- 2 Cups
                                                                                                  

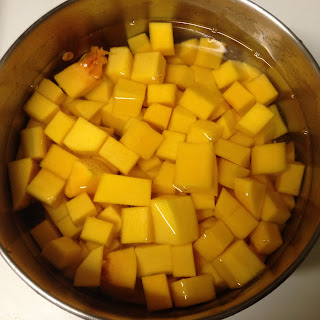
Peel, clean and dice squash. The smaller you cut the pieces, the faster they will become tender. Place squash and apples onto a larger stock pot.

 
Add water or stock to the pot. On the stovetop, cover pot and bring the contents to a rolling boil. Once boiling, reduce heat and allow to cook for 15-20 minutes, covered.


Once sqaush is fork tender, use a hand blender blender to puree squash into a smooth, liquid form. (If you don't have this type of blender, you can work in batches by pureeing squash in a food processor)


Season with cinnamon, pepper and nutmeg. For a thicker soup, let the pot simmer uncovered for a longer period of time to give off more steam. Enjoy!


Sunday, September 25, 2016

Fall-Squash Ravioli


For the first time in a long time I woke up, stepped outside, and had to grab a jacket. I walked up to Dunkin Donuts and bought a fresh pound of Pumpkin Coffee. On my way there I noticed that today's high was only going to be 68F!

After a loooong summer of keeping the grass and trees well watered, I think it's safe to say that Autumn is upon us. And to celebrate the new season, here's a Fall spin on and Italian favorite! I love butternut squash but really any gourd will do for this recipe. And just a dash of cinnamon makes these ravioli taste like pumpkin pie!

Ingredients:

For the Dough:
Pasta Dough--- Click HERE for Homemade Recipe!

For the Filling:
Butternut Squash--- 2 Lbs.
Cinnamon--- 1 tbsp.
Nutmeg--- Pinch
Salt--- Pinch

Begin by preheating the oven to 425F. Slice squash lengthwise and roast in oven for 1 hour.  


In the meantime, prepare a basic pasta dough. If you want to try a homemade recipe feel free to follow this link!

Once squash is tender, remove flesh and mash to make the filling. Season with cinnamon, nutmeg and salt.


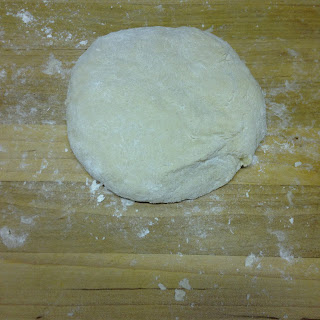
On a floured surface, roll out two thin sheets of dough. Scoop 1 tbsp of filling onto dough and space out to allow for 2" ravioli (doesn't have to be exact- make 'em as big or little as you like). Make an egg wash and brush around the filling.


Cover filling with the other sheet of dough. Lightly press around the filling to make sure there are no air-pockets. Separate ravioli by using a pizza cutter then use a fork to press and seal edges. 


Bring a small pot of water to a boil and cook ravioli until they float (should take no more than a minute). Strain with a slotted spoon and enjoy!


Wednesday, September 14, 2016

Quinoa-Walnut Granola


What to do with only a 1/4 cup left of quinoa?
I ran into this problem a few days back and did some searching on the internet. After seeing this cool article on NY Times food section, I decided to see how well quinoa was in granola. After all, I eat yogurt with granola every day so what not try and make my own? Turned out really tasty and while not overly sweet, you can always add brown sugar and raisins to add even more flavor!
                                                                                                  
Ingredients: 2 Servings 


Quinoa (uncooked)--- 1/4 C.
Quick Oats--- 1 C.
Walnuts (chopped)--- 1/4 C.
Vegetable Oil--- 2 Tbsp
Cinnamon--- To taste
Nutmeg--- To taste
Brown Sugar (optional)--- 2 Tbsp
                                                                                                  
Preheat oven to 300F. Warm quinoa in a small pan that is on Medium-High heat. It takes about 5 minutes until the quinoa turns light brown and begins to smell like popcorn. And like popcorn, you'll hear the little grains snap, crackle and pop in the pan.

In a mixing bowl, combine oats, nuts, spices and sugar. Remove quinoa from burner and mix in with the dry ingredients. Add oil to bowl and toss until small granola clusters form.

Spread granola on a parchment paper lined baking sheet. Bake at 300F for 20-30 minutes.


Enjoy! 


Monday, August 29, 2016

Peach Cobbler


Looking for a desert to bring to a Labor Day party but don't have much time? Insead of rolling out the pie dough, try this cobbler recipe! It is simply baked peaches with a cinnamon-oat topping that can easily be made in less than an hour! This is also a great dessert for college students who have a small kitchen.

At Penn State, the town of State College runs a downtown farmer's market every Tuesday and Friday-- so students pick up your peaches before the season is over!
                                                                                                  
Ingredients: For a 7x7 dish

Peaches (ripe)---  about 2 lbs.
Quick Oats--- 1 C.
Brown Sugar--- 1/4 C.
Cinnamon--- 1-2 Tbsp
Corn Startch--- 1 Tbsp


Begin by peeling peaches and preheating the oven to 350F. Slice into bite sized pieces and remove stone (pit). In a mixing bowl combine peaches with corn startch to thicken up the filling.


Pour peaches into a 7x7 baking dish. In another mixing bowl, combine oats and brown sugar for the topping. Pour the topping over the peaches and season with ground cinnamon.


Bake at 350F for 25 to 30 minutes. The oat topping should be a golden brown and you'll notice the peach jucies start to bubble. Allow cobbler to cool before serving. Enjoy!  

Friday, August 26, 2016

Oysters (On the Half-Shell)


Now, I've never been a fan of lobster, crab or shrimp... but oysters on the otherhand have to be one of my favorite types of shellfish. In fact, I love oysters so much that I don't have a recipe to go with them. Instead here's a step by step post on how to open and serve oysters on the halfshell. I've heard an oyster's flavor described as a "sweet brine" which, in retrospect doesn't give them much justice. Oysters have a flavor similar to clams or mussels but, in my opinion is a far more mild taste.

And don't let the look of the flesh scare you! If you can get over the hurdle of an oyster's looks, you'll find how delicious they really are. Don't judge a book by it's cover, right? Or in this case, don't judge an oyster by its shell!


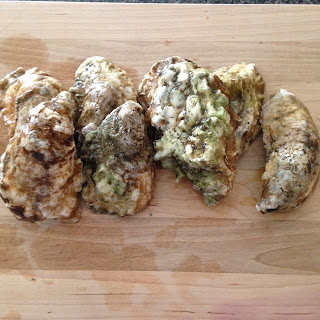
Begin by selecting the right oysters- in other words, if you are trying them for the first time feel free to purchase on the cheaper side. Depending on the store, you may find a wide variety of East & West coast oysters. Because my family vacations in the Outer Banks, I usually like to try oysters from the Chesapeake Bay. On a side note there has been alot of efforts to restore the once dwindling oyster population in the bay. (Here's a video if you'd like to learn more)


To prepare oysters, begin by selecting a small, sturdy knife. It should be sharp enough to cut through the hinge (the tendon-like section that connects both shells). Getting the hinge severed is usually the hardest part of shucking an oyster. 


You'll feel the connection of the shells become looser as you move your knife away from the hinge and around the shells' rim. (Try hard to not let any juice spill out from the shell- that's where alot of the flavor is stored!)


Once you've pried the shells open, slice the oyster's connection from the shell. Enjoy either raw, or with hot sauce or cocktail sauce! (Lemon is also a great flavoring and a tip to remove the strong oyster smell from your hands and work surface!)


Thursday, August 18, 2016

Nokedli


Nokedli, Spaetzle, Hungarian Dumplings... the list of names for this dish goes on and on. Traditionally, you'll find these flour dumplings served on the side of classic Hungarian dishes such as Chicken Paprikash but nokedli are kind of like khaki pants- they go with everything! 

These flour dumplings aren't exclusively Hungarian, in fact it seems like many European countries make the exact same dish with the only difference being the name. Much like Italian pasta, they are a delicious complement to a bold, flavorful sauce. I chose to serve this batch of nokedli with Halupki casserole ("Unstuffed stuffed-cabbage) to absorb the tangy red sauce which smothers the cabbage.

But what's with this old contraption?? It's actually a spaetzle maker
that has been in my family for I don't know how long. The bottom stamp reads "Made In Austria" so I like to believe it's as authentic as it gets. You can still buy Spaetzle Makers today and you'll see how simple and fast it is to make these dumplings!
                                                                                                    Ingredients: 

All Purpose Flour--- 1 C.

Egg (Beaten)--- 1 (Large)
Salt--- 1 tsp.
Milk--- 1/2 C
                                                                                                    In a large mixing bowl combine all ingredients. Whisk until a thick, pancake-like batter is formed. 

(If batter seems more like dough, add more milk/ if batter seems too runny, add small pinches of flour to thicken the mix)

Bring a large pot of water to a rolling boil. Pour batter into spaetzle maker. Run the batter across the bottom grater so little droplets fall into the hot water. 
(It was a little tough trying to take pictures and make spaetzle at the same time so here's a video that shows you how to use a spaetzle maker)

You'll know when the dumplings are finished because they will float to the top of the pot. (It only takes about a minute for the nokedli to cook through)
Using a slotted spoon, remove dumplings from pot and serve hot!


Monday, August 1, 2016

Mushroom Open-Faced Sliders


From a distance, these open-faced sliders look a lot like a little hamburger! But with a closer look you'll see that this fun app is light, summery and delicious. To be honest, I wasn't much of a mushroom fan but when sauteed with onions and peppers, I changed my mind!
                                                                                                   
Ingredients:

Portobello Mushrooms--- 1/2 Lb.
Sourdough Bread--- 1 Loaf
Onion (sliced)--- 1/2 C
Bell Pepper (sliced)--- 1/2 C
Tomato--- 1 Large
Parmesan Cheese (grated)--- To Taste
Olive Oil--- 2 Tb
                                                                                                   
Prep by slicing onions, peppers and tomatoes. In a large frying pan, saute onion and pepper on a low heat until they are fully tender. Remove veggies and set aside.

Cut thick slices of bread and oil both sides. Add bread and mushrooms to pan- keep an eye on the bread and flip once they are toasted.


 Saute mushrooms until tender- you'll see they tend to flatten out like a burger patty. 


Once bread is toasted, remove from pan and top with veggies, mushrooms and grated parmesan cheese. 


Saturday, July 23, 2016

Liver and Onions


Here's a nod to a classic diner dish. Growing up, my Mom's side of the family ate a lot of liver and still to this day they love ordering this from our local diner. 


Liver is definitely an acquired taste and it may seem a little unappetizing coming straight from the store. But liver is packed with nutrients and can be transformed into a tasty, complete meal by serving applesauce and mashed potatoes on the side- the way my family prefers!
                                                                                                   
Ingredients:

Steer or Calf 's Liver--- 1 Lb.
Onion (sliced)--- 1 C.
Sugar--- Pinch
All Purpose Flour--- 1/4 C.
Salt and Pepper--- To Taste
Butter--- 1 Tbs.
Olive Oil--- 1 Tbs. 
                                                                                                   

In a large frying pan, melt butter saute onions over medium to low heat. Caramelize onions by mixing in sugar. 


Coat liver in flour seasoned with salt and pepper. Add oil to pan and fry liver for 1 to 2 minutes on each side. Because the liver is so thin and tender, it's important to not overcook your protein.   


Serve warm with a heaping pile of onions and sides of mashed potatoes and apple sauce. Enjoy!


Thursday, July 14, 2016

Kebabs (Beef & Veggie)


I needed a "K" dish for my Alphabet challenge so Kebabs were a no-brainer! Although I went with a fairly standard kebab recipe, you can get very creative with what you put on your skewer. The beef kebabs were great but I'd love to try chicken and even veggie kebabs in the future. The grilled vegetables are really what make this dish as they seem to help season the meat and vice-versa. And for even more tender and flavorful kebabs, marinate your beef a few hours before grilling!
                                                                                                   
Ingredients:

Sirloin Steak (cubed)--- 1 Lb.

About a Cup of Each Vegetable/Fruit:

Bell Pepper
Onion
Zucchini 
Eggplant
Tomato
Mushroom
Garlic
Pineapple 

Salt and Pepper--- To Taste
Olive Oil--- 1 Tbs.
                                                                                                   
Preheat grill to Medium-High. Thickly slice vegetables/fruit so they will stay secure on a skewer. Cube beef and season with salt and pepper. Feel free to add other rubs, spices and/or herbs at this point.


Assemble skewers any way you want- you can put as much or as little on each as you desire!


Place kebabs on a lightly oiled grill. Allow time to cook to your preferred doneness. My family likes ours on the rare side which takes about 5 minutes. Medium would be about 6 to 7 minutes


Remove from grill and plate on a large serving platter!